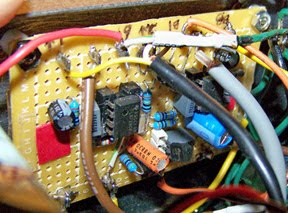
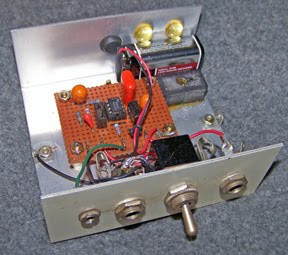
SOIC adapters & sockets are expensive, who knows why, there's no reason they couldn't be as cheap as DIP sockets. It's seems like all the new sexy audio chips are coming out in surface mount packages only. Here's a cheap way to convert a SOIC to fit into a standard DIP socket.
First I cut a piece of perfboard 4 holes by 4 holes.
I used a 2 - 8 pin DIP sockets, the bottom one is just so I could put pressure on the wires without messing up the pins of the top one. Then I simply stuffed some short wires thru the holes in the perfboard on into the top socket, and bent the wires over.
Here's what it looked like after putting in all the wires and trimming them with snips.
I printed out a SOIC to size (not shown) and used it it as a template to further trim the wire leads.
I tucked the SOIC leads under the wires for a snug fit.I did have a little trouble lineing everything up because everything was still loose at this point. So I used a drop of super glue to anchor the SOIC, and I could move the wires into position and solder them in place much easier.
Here's the finished thing-a-ma-bob. I ended up gluing the perfboard to the socket to make a nice solid package.
The socket was 10 cents at a nearby surplus dealer, the small piece of perfboard couldn't be more than a pennies worth and the wire leads were scrap. Over all, the deed was done dirt cheap. Aligning and soldering the tiny leads was a pain though. A conductive glue would probably work just as well as soldering, I may try that.
Now I can use all those fancy-shmancy SOIC chips in my experiments!
Monday, April 5, 2010
Monday, March 29, 2010
"THE SPLENDER" featuring the EARCO Rock-N-Roller Wheel TM
I just finished building a Splitter-Blend from Run Off Groove, You can find the schematic at runoffgroove.com. It basically splits your signal and runs each side chain through 2 parallel effects loops then mixes them back together for the output. By putting different effects in each loop you can blend them to achieve lots of unique tones.
I also added a few simple mods that make it more useful. I used normally closed jacks connecting the input and output for each loop, that way you can put your effects on one channel and the other channel automatically sends through a straight signal. The connection is broken when you plug into any jack. Blending in the straight signal with the effected signal works especially well on bass, because you can add a little uneffected signal that lets you retain the bottom even on effects made for guitar. Adding some straight signal can also add a little clarity to a fuzz tone or you can make a phaser like effect by slowly rocking a wah pedal in one of the loops. I also put the phase switch on a DPST foot switch so the phase can be inverted when playing. The blend pot knob is from a junked toy truck and allows you to use your foot to adjust it (henceforth to be known as the "EarCo Rock-N-Roller Wheel TM" using EarCo's unique "Speedwheel TM" technology). The Rock-N-Roller Wheel TM makes it easy to rock back and forth between effects setups.
I also added a few simple mods that make it more useful. I used normally closed jacks connecting the input and output for each loop, that way you can put your effects on one channel and the other channel automatically sends through a straight signal. The connection is broken when you plug into any jack. Blending in the straight signal with the effected signal works especially well on bass, because you can add a little uneffected signal that lets you retain the bottom even on effects made for guitar. Adding some straight signal can also add a little clarity to a fuzz tone or you can make a phaser like effect by slowly rocking a wah pedal in one of the loops. I also put the phase switch on a DPST foot switch so the phase can be inverted when playing. The blend pot knob is from a junked toy truck and allows you to use your foot to adjust it (henceforth to be known as the "EarCo Rock-N-Roller Wheel TM" using EarCo's unique "Speedwheel TM" technology). The Rock-N-Roller Wheel TM makes it easy to rock back and forth between effects setups.
Vactrols
I made these homebrew vactrols (photo-resistor opto-couplers) at a total cost of less than 40 cents each.. They are typically used in compressors, tremolo, phaser, flanging, envelope filters and other modulation effects. These were made using flat top and rectangle shaped LEDS super glued to Radio Shack LDRs (Light Dependent Resistors or also called photo resistors). The black one was made with Sculpty clay, and the other two I used epoxy puddy to encase the LED/CdS combo. That was done to insure no light can get in. I had tried just using shrink wrap, but the shrink wrap still let some light thru. Having to heat the black one in the oven to set the Sculptey clay didn't seem to effect it's function. From what I could test using only a multi-meter they spec out close to the CLM6000 and should work in most circuits calling for that vactrol with little or no adjustment of other components.
I tested these in the wah wah unit shown in my previous post using a simple 555 timer LFO and they worked well. The 555 timer circuit I used only put out a square wave (off/on) so it wasn't ideally suited to a wah. A ramping or triangle wave would be much better, however that was not a problem with the vactrols but only with the LFO.
I tested these in the wah wah unit shown in my previous post using a simple 555 timer LFO and they worked well. The 555 timer circuit I used only put out a square wave (off/on) so it wasn't ideally suited to a wah. A ramping or triangle wave would be much better, however that was not a problem with the vactrols but only with the LFO.
Sunday, March 28, 2010
2 Buck LFO
I was going through some old stuff and came across this old Wah Wah I had made a while back. I spliced in an output jack where normally you would have the circuit go to the wah wah pedal's pot. That way I could experiment in ways to control the wah remotely. Originally I had hooked up a pot to a 12" bar and made a bracket that was attached to a guitar. It was sort of a "Whammy Wah TM". I don't have that part left, I had trouble attaching it to my guitar strong enough without altering the guitar or drilling holes. I may revisit that Idea now that Velcro is easy to get.

I saw the little finger flashlight below at a computer store by the checkout counter. It has three modes of operation - 1. always on, 2. slow flash, 3. fast flash. I thought by combining it with a photo resistor i could use it as a cheapo LFO (low frequency oscillator) to control the wah.
Here I shrink wrapped the "2 buck LFO" to a photo resistor from Radio Shack. Radio Shack has a little grab bag of various photo resistors for about 3 bucks, and surprisingly almost all of them are useful.
The "2 buck LFO" works pretty good and gives a nice tremoloy wah through my circuit, now if only I can open this baby up and find a way to control the flash length and speed, it would be really cool.Stay tuned.
By the way the wah curcuit came from "Practical Electronic Music Projects" by RA Penfold, a great starter project book. I'm not sure if it's still in print and I can't find my old copy. RA Penfold wrote a number of other great effects books too.
Knobbys
Here are some knobs I made for my Squire Affinity Strat. They are made using Sculptey bake clay that you can find at most art, craft & hobby stores. You bake at 250 for 10 minutes it turns into a solid plastic. I used an old useless pot to mold the knobs around so they would have the pot stem grooves in them. I left the pot stem in when they were baked and only removed it after it was done. It's best to use an old pot, I'm not sure if 250 degrees would ruin a good one but it's best to be safe. They work perfectly, and the knob shapes you could make are endless.
The clay even comes in a bendable rubbery version called Bend-N-Bake that may give a better feel or "grip". You could use this tip to make knobs for effects too. This clay is also good for prototyping other small plastic mechanical parts and do-dads, it is pretty strong stuff but there is a limit on the amount of strain it can endure.
The clay even comes in a bendable rubbery version called Bend-N-Bake that may give a better feel or "grip". You could use this tip to make knobs for effects too. This clay is also good for prototyping other small plastic mechanical parts and do-dads, it is pretty strong stuff but there is a limit on the amount of strain it can endure.
I'm Newed
This is my newed blog. It will chronicle my strange meanderings into the world of DIY electronic effects, guitars, and other miscellaneous inventions of a demented mind. I hope somebody somewhere may find my experiences useful, or at least laughable.
Subscribe to:
Posts (Atom)


